Recent Posts

Sunday, July 28, 2013

Urban Goose Chase Review


For those who may be stumped by my title....and asking, "What is an Urban Goose Chase?"  It is a big city "action task" scavenger hunt using mobile devices to run and capture the event.  I will post a link below, but because I saw such a lack of reviews and information on the event outside of their own site, which isn't exactly an "unbiased" opinion, I thought I would give it a go on my blog.

To preface, it was just made official that our team, Suburban Marauders, won 1st place for Saturday's Detroit event...so I will do my very best to be fair in my assessment and maybe give a few tips that will help future urban goose chasers beyond the obvious "Read the FAQ's and rules on the site" ;) Also, a couple observations come from some very deep digging on the net and their facebook page for common complaints.

Shout out to my Suburban Marauders peeps: Marc, Mike, Liz, Vinh, & Team "Captain" Chris!


1. To start:
Well, there is no "Starting Point" in the game.

This leads to some odd situations where people are not doing the hunt completely in the big city limits. However, I would say for the most part that people follow the rules to stay "in the area".  The issue I see arising from this, is some of the tasks are extremely difficult in certain cities, and for that, are high point tasks.  (Such as, finding a gas station or grocery store in downtown Detroit to complete a task.) If someone didn't follow the rules and went outside of the city to complete most of their quests, they could easily find themselves winning the game.  

I think a "start point" would put people on an even playing field.  On the other hand, it was nice to be able to use some level of strategy what part of the city to start in, and alleviated many of the "following" teams that will piggy back on your efforts by simply following you around.  We actually had one team use that strategy yesterday when they realized that we were the leading team at that point. I don't have a problem with using strategy like that...but it would definitely become redundant and would also create a situation where one specific area becomes inundated with the contestants. I am glad that we had the element of surprise and not viewed as more of a nuisance by most of the people we asked for help. Additionally, it allows people to be far more creative with their submissions- which is half the laughs, after all!

In conclusion, no starting point spreads the love all over the city, but maybe an initial gps "check in" should be incorporated in the game so that they can confirm that all contestants are in the city when they start playing.

2. Clear photos are very important.

If you or the person you are asking to take pictures can not click a clear shot, you may be out of luck.  Make sure you have a decent phone and a reliable picture taker. Double check photos before you submit.   Case in point, we all paid to get on the people mover, with the Macarena blaring on a team member phone, and over 8 people doing the Macarena, including two small children sitting in seats (for safety) dancing with their arms. The guy who took the shot only snapped 7 of us, blurry, pretty much arms only.  We had to jump off in a rush next stop, and when we saw the image didn't realize what he had done. We may have done the challenge, but we didn't get the shot approved (which we absolutely agree with that choice by the judges). It was worth a ton of points. Learn from our mistake.

BAD  Photo :(

3. The devil is in the details (kind of)

Be very careful to read the quests. One tiny detail will cause you to have the photo eliminated. Kind of. The judging is NOT equal or fair. Some people got a pass for the same mistakes that we made (example: one of our photos was eliminated because we did everything asked except wear a helmet.  Another team made the same mistake and their photo was not thrown out.)  And there is no way to dispute a judge's decision. So do as many tasks as possible and don't give up....you never know what photos will be thrown out for all the teams.  

4. People can be haters (sometimes)

Unfortunately, UGC incorporated a up/down voting system on the app photos.  It is totally unnecessary and does not affect the final judging, but what it does do is allow other teams to be negative and spiteful. Remember to not take it personally when you see your photos downvoted on the app and have no idea why (there are no comments, thank goodness). It also allows other teams to be nice, but when it's a competition like this, and people are grumpy about unfair judging, or they want to psych out another team...they let it out the only way they can...down-voting other people's photos.  They will even downvote great photos done within the rules...don't let it get you down.  I think the up and down voting should be completely removed.  It serves no good purpose. So I suggest ignoring the up and down voting completely while you play and after during judging. Remember to just stay upbeat. Smile and wave at all the orange peeps, remembering that the people running around competing against are playing the city jesters just like you!

5. Judging is not always "fair"

Yeah, I know I already said that, but it bears repeating. Be prepared to have fun, be prepared to have a great time with friends, be prepared to walk A LOT, and get out of your comfort zone. But with that said, be prepared to suffer a couple of disappointments and a few surprises at final judging. It's probably simple human oversight for the most part.  I am sure people have lost the winning slot because of unequal judging, and it doesn't look like the owners of UGC will be doing anything about some of the glaring inconsistencies. They state clearly that judging is final and they will not answer emails contesting judging. I hope they will change this, because it stinks. BUT, if you remain focused on just having fun and enjoying the actual competitiveness with other fun-loving people- you are going to have a GREAT time.

6. What watering hole?

It was really a bummer that at the end there was no sponsored eatery with a bar.  I definitely think all cities should have a proposed destination where everyone can meet up after it's over.  Obviously this would be optional, but since there is very little way for people to communicate before and after (besides a very obscure "recent posts" section on their Facebook wall that can be muddled with other unrelated questions, photos, posts, etc.)  I would have loved to toast everyone who played along and share stories and laughs about our day's antics in the big city. While I don't think people should message each other- that could go wrong on so many levels- I do think UGC either should not post on their website that people meet up after at a "watering hole" unless it is easier for one to be met up at, or simply fix this issue. I think it would prove a great promotional benefit if they pulled in the help of an establishment for an "after party" location.

Final thoughts:

I would absolutely do it again, and plan on it. Our team went in not expecting anything but a fantastic day together as friends...we were in shock to find we were battling for 1st place half way through, and while certainly, that made it all the more fun, it would not have changed that this is indeed a tremendous way to spend a Saturday with fellow fun-loving people! Want to join in an Urban Goose Chase near you? Just go to urbangoosechase.com.

Happy Chasing!

Celebrating at our watering hole of choice: Detroit Beer Co.


Monday, June 3, 2013

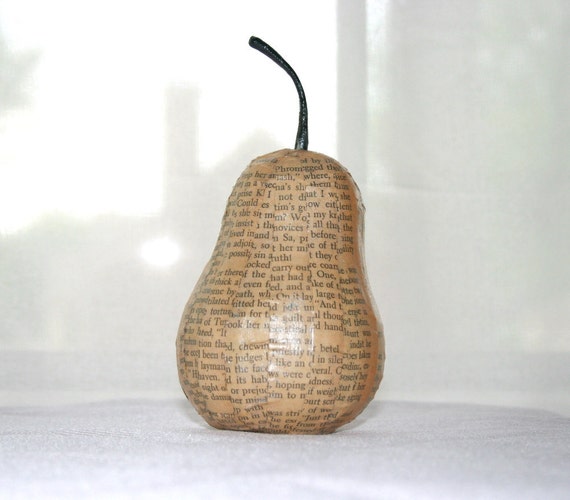
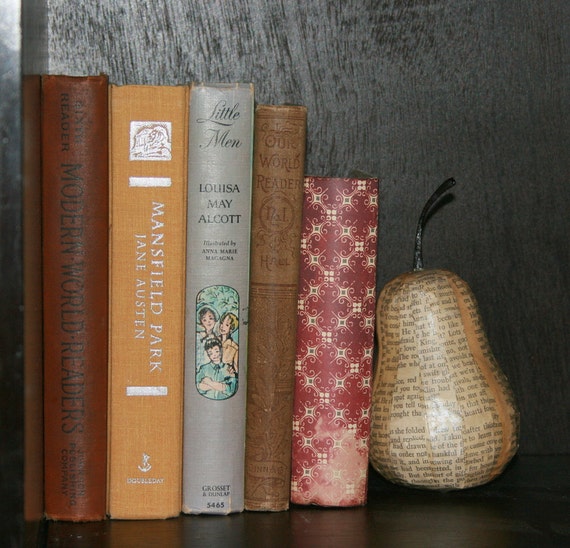
Dollar Bin: Paper Mache' Fruit


Dare I admit that my paper mache' sculptures are sometimes dollar bin finds from Michaels?  Of course!

When I first purchased the paper mache' fruit, I think it sat in my "future use" storage for a few months. Which is actually pretty good, because the average is a couple years unless I am incredibly inspired about something. Sad, I know.  But I have accepted that my inspiration for things can be very overwhelming since I see an idea or tweak in most everything around me. These fun fruits found their way onto my design table faster than most because I was working on cupcake gift boxes.  I had a lot of extra glaze (a special mix I make) so I grabbed the fruit and some vintage paper and got to work.


I have a method to my madness in covering pieces to enhance shape and form and the text from the book I am using, and it does take a lot more time than just slapping on pieces willy nilly.  But willy nilly would work nicely too for those with a little less patience than me.

I haven't made any in a while, but just looking at the photos again reminded me that there are a few more lonely fruits in storage....banana anyone?

Saturday, April 27, 2013

Daddy Daughter Dance Layout

I don't often get the chance to create a personal layout these days, but I have found that the best way for me to get out of an artistic block is to pull together a layout from a recent photo.  I struggled with this picture because the backdrop in the photo is garish.


Finding paper or embellishments matching the "neon garden" style requires a little digging. Luckily I remembered purchasing this great Simple Stories line of paper at Scrappy Chic called Fabulous.  And even though the paper was originally for a bedroom decor project in Bekah's room, I had purchased the bright crochet flowers with this layout in mind. They fit perfectly together.  


The kraft tags are stamped with some fun images I have collected over the years from those same dollar bins, and the title is made with Technique Tuesday stamps. Pearls also came from that same famous bin....notice a pattern here? My husband always announces in Michaels when we approach the front to pay for my supplies, "And now 15 minutes to stare at the dollar junk." Then proceeds to start playing a game on his phone.  The craft stores have made a mint off of me from those bins. Of course, I have made some pretty nifty things from them, so the complaints have evolved to a teasing joke :)

On Monday, I will be showing examples of the fun things I have made over the years from the craft store dollar bin. I look forward to having you come share in the inspiration!

Faith

Monday, January 7, 2013

Inspiration Tidbit: Vignette Addition

An inspiration tidbit from my home to yours:

A little something I added to my entry vignette :) This is just a quick impromptu blog, so forgive the "less-than-desirable" photos.  The "vintage door knob" hanger was from Hobby Lobby, and the keys were from the dollar bin in Michaels. I tied the keys together with my hand-dyed vintage ribbon- Love how it turned out!  


It was a quick way to make fabulous impact on the overall balance of the vignette design. (Framed photo is photography by: Ara133Photography)

Have an inspired day!

Sunday, December 23, 2012

Replaced on the Dollar- IKEA Blomster

Every once in a while I find something on the cheap to replace a design element I have held off on purchasing.  This one I just had to share.

I have been eyeing the IKEA Blomster clear 3-pc set for quite some time. I wanted 3 sets for Christmas decor and other event decorations. They are very versatile, beautiful, and tealights are a quick, easy, inexpensive, no-mess way to add candlelight to a party.  Unfortunately, tealight holders generally don't have a lot of height, or are very style specific. I had seen a few examples of clear glass holders of tiered heights in a couple design magazines, but had no idea where to get them.  That's why, when I found the IKEA set, my imagination went wild over all the great ways I could achieve different looks with vignettes, table top decor, etc. I thought the $15 per set of 3 was a fair price.  I know not everyone gets so excited about tealight holders- call me strange- but I was seriously giddy when I found them.


However, I had not gotten around to forking over the $45.  Other things always seemed to catch my eye in IKEA when I would drop in to blow all my money pick up a few things.  Imagine that.

But now, boy am I glad I was sidetracked because look what I found at the dollar store:


On the mantle at home- yay!
Now, I know they are not exactly the same in design, but they function exactly the same way, and certainly meet the standard of "pretty darn close".  I actually find the ones from the dollar store to be more neutral in design...which is a good thing for these in particular. Especially since I am buying them for their design versatility.  


I purchased 9 holders in-store (the equivalent of 3 sets) for $9!!!! Two sets are already up on the mantle for Christmas- love it! The reviews do note about the stickers...I had no problem removing them by laying them in a casserole dish and gently pouring hot water in the dish to let the stickers soak.  The stickers rubbed right off without any issues. 

If you buy online, I think it must be purchased in bulk, but I had no trouble finding them locally for a $1 a piece.  And, seriously, you can get a box of 24 for less than the cost of 2 Blomster sets if purchased online at dollartree.com.  


This is definitely a win-win find. What awesome dollar store items have you found as a trade for a much pricier item? 

Have an inspired day!

Faith


Sunday, August 5, 2012

My Black-eyed Peas Recipe

Today we are having one of my favorites meals of homemade comfort food heaven: Southern style barbecue pulled pork, black-eyed peas, collard greens, and macaroni and cheese.  By far my husband makes the best mac and cheese I have ever had in my life. And sorry, he doesn't give out the recipe ;) So I am stuck with giving you my black-eyed peas recipe, which the whole family loves as well. (At least, that is what they say....haha) It is surprisingly healthy- unlike that macaroni and cheese that makes you gain five pounds just smelling it- and can optionally be made with more liquid added along the way and some favorite veggies to make a yummy soup.

What you will need:

1 Bag of dried black-eyed peas, rinsed and soaked.
10 cups Water
1 Smoked ham hock
1 Green tomato, quartered
1 Small Jalapeno, halved and seeds removed
2 Garlic Cloves, peeled and halved
8 Fresh sage leaves
3 Sprigs of thyme
1/4 Large red onion, halved
1-2 tablespoons Salt (or to taste)
1/2 teaspoon White pepper

Bring first 8 ingredients to boil all together in a large pot or dutch oven.  Turn down burner to low and let simmer for one hour. Stir occasionally and check water level to make sure water is always above the beans as they cook. Add salt and pepper to taste. Continue simmering on low until beans are tender and soft with no graininess, always remembering to stir occasionally. Remove ham hock from the pot, and cut of all meat from the bone and chop up into small pieces. Remove garlic, herbs, pepper, and onion (or leave them in and just avoid them when serving). Add ham hock meat back in, and stir. Serves 8-10 as a side dish.

Enjoy!


Wednesday, July 11, 2012

Quick Upcycle: Cork Board

Hello to all!

It has been an insanely busy Summer so far, but one of the things we have been working on is our home renovations (Yes, still going...but the end is in sight.)  Here is a quick revamp of an old (and ugly) cork board that is now hanging on the wall behind the door in my daughter's room.  It's a tight squeeze for photographing so photos aren't magnificent, but hopefully you will glean a little inspiration of your own from it.


To achieve this look, I covered and taped off the cork board then spray painted the frame.   Once dry, I carefully inked up a large corner stamp (Fancy Pants).  I actually did two trial stamps on the back of the board to get a feel for it- it's hidden, so I highly recommend it so you can get a feel for the ink and pressure you will need :)  A stencil and paint will work fine for the corners as well. Once this is done, attach the hangers that go with the board (if you don't have any, they can be purchased at any craft/hobby store.)


I doubled the twine and tied it off a few inches off to the side, and tied the ribbon and tags to the twine using a bow from the long hanging ends.  You certainly could just do it in the center, but I love the look of offsetting, and am playing with the idea of adding a paper blossom arrangement later.  

Materials you will need:

White paint (I used spray paint)
Large corner stamp or stencil
Ink or paint for stamp/stencil
Thick twine or thin rope
Decorative ribbon scraps
Tea stained and stamped tags
Painters tape and covering for the cork

Have an inspired day!

Faith