Recent Posts

Showing posts with label shabby chic. Show all posts

Monday, June 3, 2013

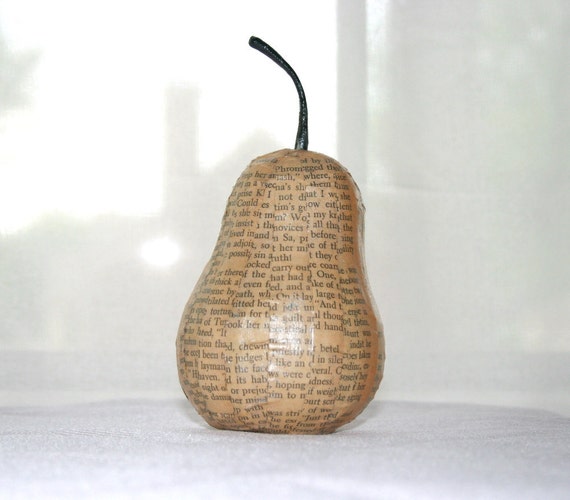
Dollar Bin: Paper Mache' Fruit


Dare I admit that my paper mache' sculptures are sometimes dollar bin finds from Michaels?  Of course!

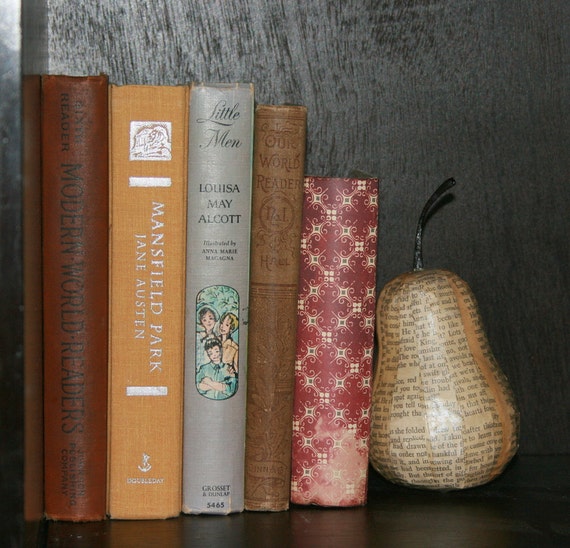
When I first purchased the paper mache' fruit, I think it sat in my "future use" storage for a few months. Which is actually pretty good, because the average is a couple years unless I am incredibly inspired about something. Sad, I know.  But I have accepted that my inspiration for things can be very overwhelming since I see an idea or tweak in most everything around me. These fun fruits found their way onto my design table faster than most because I was working on cupcake gift boxes.  I had a lot of extra glaze (a special mix I make) so I grabbed the fruit and some vintage paper and got to work.


I have a method to my madness in covering pieces to enhance shape and form and the text from the book I am using, and it does take a lot more time than just slapping on pieces willy nilly.  But willy nilly would work nicely too for those with a little less patience than me.

I haven't made any in a while, but just looking at the photos again reminded me that there are a few more lonely fruits in storage....banana anyone?

Monday, January 7, 2013

Inspiration Tidbit: Vignette Addition

An inspiration tidbit from my home to yours:

A little something I added to my entry vignette :) This is just a quick impromptu blog, so forgive the "less-than-desirable" photos.  The "vintage door knob" hanger was from Hobby Lobby, and the keys were from the dollar bin in Michaels. I tied the keys together with my hand-dyed vintage ribbon- Love how it turned out!  


It was a quick way to make fabulous impact on the overall balance of the vignette design. (Framed photo is photography by: Ara133Photography)

Have an inspired day!

Sunday, December 23, 2012

Replaced on the Dollar- IKEA Blomster

Every once in a while I find something on the cheap to replace a design element I have held off on purchasing.  This one I just had to share.

I have been eyeing the IKEA Blomster clear 3-pc set for quite some time. I wanted 3 sets for Christmas decor and other event decorations. They are very versatile, beautiful, and tealights are a quick, easy, inexpensive, no-mess way to add candlelight to a party.  Unfortunately, tealight holders generally don't have a lot of height, or are very style specific. I had seen a few examples of clear glass holders of tiered heights in a couple design magazines, but had no idea where to get them.  That's why, when I found the IKEA set, my imagination went wild over all the great ways I could achieve different looks with vignettes, table top decor, etc. I thought the $15 per set of 3 was a fair price.  I know not everyone gets so excited about tealight holders- call me strange- but I was seriously giddy when I found them.


However, I had not gotten around to forking over the $45.  Other things always seemed to catch my eye in IKEA when I would drop in to blow all my money pick up a few things.  Imagine that.

But now, boy am I glad I was sidetracked because look what I found at the dollar store:


On the mantle at home- yay!
Now, I know they are not exactly the same in design, but they function exactly the same way, and certainly meet the standard of "pretty darn close".  I actually find the ones from the dollar store to be more neutral in design...which is a good thing for these in particular. Especially since I am buying them for their design versatility.  


I purchased 9 holders in-store (the equivalent of 3 sets) for $9!!!! Two sets are already up on the mantle for Christmas- love it! The reviews do note about the stickers...I had no problem removing them by laying them in a casserole dish and gently pouring hot water in the dish to let the stickers soak.  The stickers rubbed right off without any issues. 

If you buy online, I think it must be purchased in bulk, but I had no trouble finding them locally for a $1 a piece.  And, seriously, you can get a box of 24 for less than the cost of 2 Blomster sets if purchased online at dollartree.com.  


This is definitely a win-win find. What awesome dollar store items have you found as a trade for a much pricier item? 

Have an inspired day!

Faith


Saturday, May 12, 2012

Decoupaging Clothespins

I haven't done a "how-to" in a awhile, so thought I would do a small one today while the house is still relatively quiet.

Many of you have seen my decoupaged clothespins. They are pretty easy to make, but there are a few tips to make sure you are creating something that isn't going to fall apart on you and will look their best for years to come no matter how you use decide to use them.


What you will need for this project:

  • Plain wooden clothes pins
  • Decoupage 
  • Matching printed  paper selection 
  • Small bowl of water
  • Sponge brush
  • Paper towel or rag
  • Trimmer
  • Distress Ink/Chalk (optional)

Directions:

Measure the flat side of the clothespins. Cut the paper strips to the measurement. Using your lightly dampened brush, apply a thin layer of decoupage on both the side of the clothespin you will be placing the paper on, and the backside of the paper. Adhere together.  Make sure placement is as exact as possible.  Gently wipe off excess decoupage, trying to avoid getting decoupage on the printed side of the paper.  Set aside with paper side upright on paper towel or rag and let dry.  Repeat with all the clothespins for your project.  Let them dry completely (see the directions for dry time on your decoupage bottle).  Optional: distress ink/chalk edges.  Once dry, put another layer of decoupage on top of the papered side and let dry.

Here are some important tips:

Measure the flat side of your clothespins and cut to size as exactly as possible.  This is very important.  Paper that is too big or too small on the clothespins looks shoddy, and larger strips will not stay adhered as well. 

Heavier stock paper works much better for this project.

Do not use xyron, zipdry, or other adhesives instead of decoupage.  For something as small as a clothespin, it does not work as well. The firmness of the top protective layer causes the paper to eventually lift off the clothespin.

I do not recommend homemade decoupage because is yellows and is more likely to crack on this project.

I like to boil (about 15 minutes) and dry my clothespins to breakdown the wood sealant a little.  Clothespins that you buy at the store for laundry use typically have a bit of weatherproofing seal on them that can make it more difficult for a good initial adhesion.

The final seal on top of the paper can be done a second time to make sure it is well-protected.  Just remember to allow the decoupage to dry completely between coats.  

Using high-gloss for the top coat process gives a very unique look. I usually use matte, but using gloss, glimmer, outdoor, or another sheen is totally fine.  


Have an inspired day!