Recent Posts

Monday, April 8, 2019

Spring Cleaning: Two Years Later

So a few of you may have noticed that I suddenly stopped posting mid-spring cleaning. Believe it or not, we actually followed each day, and I took photos and all that jazz to share with my readers, but...

Life decided to hand us some big news and it didn't slow down! Many of you are already "in the know", but I needed to get back here to give some explanation for my disappearance from the blog.

One, my husband accepted a position at new company and we moved to Pennsylvania. We live in Kennett Township, home of the sweet little historical town of Kennett Square. Our home sits nestled in a more rural area near the Delaware border. It has been quite a change from our life in Dearborn, Michigan. As you can imagine, life here, settling in two teenagers, trying to shift gears for business, and many other changes have been all-consuming.

Two, after years of being quite ill, I finally found a doctor who would treat my illness properly. As I started to get better and found a doctor here in PA who would continue treatment on the same path, something I had come to accept as my reality, infertility, suddenly reversed itself.

So, at 41, I found myself pregnant.

As I sit here with a darling sleeping 5 month old in my lap, I am overwhelmed with appreciation for all the changes that can happen very suddenly in life that can bring more joy than ever imagined.

But I am still a little sleep deprived, so please accept my apologies if my blog suffers for it.

Much Love!

Faith


Tuesday, April 11, 2017

Spring Cleaning with Apartment Therapy: Day Two


Okay. I am exposing my embarrassing fridge for the day two challenge. Lucky you.

Before
A little over a year ago, we purchased a Samsung counter depth food showcase refrigerator. We love it. It is perfect for teens, and we literally have seen a difference in our electricity bill because we put the most commonly used foods and condiments in the front showcase. After a while, though, laziness sets in, and things start being put "wherever it can be shoved". We also made a rule that all leftovers or carry-out must be placed in our storage containers. It doesn't always happen, but really, this has been a HUGE help in keeping things less cluttered and chaotic. It also helps limit food waste and we are more prone to recycle the other containers right away. I find Styrofoam vile and a health/environmental hazard, so we try to get our food out of those types of containers as quickly as possible anyway.

I can't get enough of the InterDesign and mDesign acrylic fridge/food organizers. They make life a lot easier. We also use the special green-lidded Rubbermaid containers for fruit and veggies which lends to even more naturally easy organization with quick identification of the type of stored and slower food spoilage. It may not be designer beautiful, but it is extremely functional. Still, we are not perfect, so day two was a good kick in the pants for us as a family. 

Everyone pitched in a little for this one. Hopefully we will maintain our clean and organized fridge...well, at least for a couple weeks longer than last time...Baby steps.

After- Inside


After- Showcase Door


Happy Spring Cleaning!

Faith


Monday, April 10, 2017

Spring Cleaning with Apartment Therapy


'Tis the season for Spring cleaning, but for me, it's a bit more of necessity since we are preparing for a big move. While we are packing and planning, sometimes the mundane chores get lost in the larger projects. When I came across the Apartment Therapy challenge, I decided to sign up to help me stay motivated and on task. Even when tired and sore, a little extra 20 minutes is worth the peace of mind and the comfort of a community ritual.

First day: Cleaning the rubbish bins in the kitchen

I made my son do it.

Yes. I know. I'm horrible.

;)

Maybe tomorrow will be something less vile from having two teenagers in the house and I will take a picture of my progress.

Happy Spring Cleaning!

Faith 


Friday, April 7, 2017

Adventures in Gardening: Stevia (not Truvia)


On my forever quest to find healthy alternatives to refined sugar for the family and for my guests, I have definitely found one that I have fallen in love with over the past couple years after I grew it in my herb garden for the first time in 2011.  The name of the plant is Stevia, and it is very likely you have heard of it before since it is mentioned in commercials for a product called Truvia.  I am not recommending Truvia in any way. I have not used it. I have since purchased stevia packaged by Trader Joe's, and am pleased with the product, however, there is nothing like growing it in your own yard.

I have started to grow it in my butterfly garden section of my yard instead of the herb garden with even better results.

One very cool way to sweeten coffee calorie free is to add the dried leaves to the coffee beans in the grinder, or the crushed leaves to your coffee grounds.  Same goes for tea.  While I know it can be purchased in highly processed form from the grocery store under the name Truvia, I am always hesitant when something is processed to the point of unrecognizable.   I still have dried leaves, and have ordered the plants from Michigan Bulb and purchased from our favorite local nursery, Schwartz's Greenhouse.

Happy Gardening!

Faith


Thursday, December 29, 2016

Branching Out


My favorite custom request this year...for so many reasons.


We're coming to the close of another year, and I wanted to once again thank my wonderful customers for their continued business. I also want to thank my family and friends for the love and support as we navigated the twists and turns that came with Jonathan's recovery from the accident. We are hopefully celebrating his last surgery which took place on the 23rd. It truly is a year I gladly leave behind, but not without the hard lessons learned. I can find appreciation for the growth this year. 

I think most of us will relate with one another when I say "Hasta la vista!" to 2016, though. 

So much has changed since the days of my small office/craft room.


Many changes are coming to Inspirations by Faith and Novel Adornment as we also begin our new journey as a family in 2017. This year, I finally took the plunge and will be incorporating and expanding- laying the groundwork for a much larger scale production than I ever thought possible over these past years. It was about time I realized it was time to fish or cut bait, as my business has all but taken over the basement and some portions of the main floor of our home. Looking for a home with a dedicated large studio and office space has been a bit surreal.

And I started an Instagram account...finally. 
(My account is not terribly interesting or appealing quite yet, but I have to start somewhere and work my way into it.) 

I also had the wonderful pleasure of meeting fellow sellers on Etsy and the absolutely delightful Vanessa Bertozzi from Etsy corporate (Brooklyn, NY) as we discussed Etsy benefits and challenges for the coming new year. Vanessa's insight was invaluable, and I genuinely wish many others had the same opportunity. I have always loved Etsy, but have been met with concerns over the past couple years about where I fit in the Etsy community as the business expands. After the discussions we had in that get together, I know I still have a place there to call home. I plan on doing a lot more blogging on some of the new venues and features we will be utilizing. 

One very happy moment that came along is reconnecting with a colleague and fellow artist from my designer/teacher days. That has been a great joy to me this year. I hope to soon be able to share more about our collaboration this January.

So cheers to the coming year, and to all the big changes it will bring!

Faith


Saturday, December 24, 2016

Re-think Pressed Pennies

Okay, so if you have kidlets, you probably have a bunch of these little flattened pennies from travel, amusement parks, and field trips.  They are inexpensive, and even us stodgy adults love to watch the process of a penny being smashed and pressed into a pretty little souvenir. But then you get them home...well, then what?

Over the years I have looked at the stashes of these shiny little mementos, and wondered what the heck I was going to do with them.  Put them in a jar? Nope. Then the jar became the change dumping ground, and they became mixed together.  After that, they end up all over the house in various areas. My favorite irritation was finding them clunking away in the washing machine.

Many of you know that we usually take an annual road trip around the US.  We started collecting ornaments for each special location.  A few years back, I decided to use our smaller artificial tree (purchased for displaying my ornaments at local shows- remember when I did those???) to also display all of our travel ornaments and special handmade or colorful keepsake ornaments that don't match the silver, cream, and white decor of our living room tree. We set it up in the sunroom and surround it with all our fun Christmas creations.

That's when I had a flicker of inspiration....

So I shouted to the kids to find all the pressed pennies they could from our trips. I grabbed my thin hemp twine, and my crop-a-dile, and voila!


Just one more crop-a-dile miracle ;)


Merry Christmas!

Faith


Monday, November 21, 2016

Black Friday Weekend Sale

Inspirations by Faith & Novel Adornment will have store-wide sales. Coupon codes will be announced on Facebook on Thanksgiving day.

Happy Shopping!


Monday, November 17, 2014

Just a peek...


... at one of my "Drying Stations" at home. The reclaimed door is annually turned into my Christmas card holder during the holiday season.


(Tea-stained tags and hand-dyed vintage ribbon and embellished clothespins available at http://inspirationsbyfaith.com)

Have an inspired day! 


Saturday, October 25, 2014

Young Maleficent Costume


Quick post today for those who have a daughter like mine who always comes up with the hardest to find or most unique characters to be. By no stretch of the imagination is Maleficent a unique costume this year- one of the reasons finding horns was close to impossible- they are sold out everywhere. Bekah, however, did not want the run-of-the-mill black costume set. She waned to be the young Maleficent, and was so clear on that point that she said that she would pick something else before going with the older version in black. So if you are looking for a quick link list on how to get this look before Halloween, here it is (having Amazon Prime is highly recommended):
  • Dress (will be sewn to create an umpire waist dress, but could be  modified quickly without sewing)
  • Horns (will be spray painted brown)
  • Wings (brown fabric cape could be added to make them look more substantial)
  • Tights 
  • Ears (if you can't get them locally- remember the spirit gum if you don't have some at home)
  • Sheet of faux leather to make pouch and jewelry (Joann Fabrics)
  • Wood or glass beads for jewelry (Joann Fabrics)
  • Brown shoes of your choice
I'll post the final product with photos and how I achieved the total look after Halloween, but hopefully this post will help another scrambling parent out there :)

Have an inspired day!

Friday, March 28, 2014

Preparing for Spring

Just wanted to quickly share my latest home decor project. It was very easy to do, and this is a very usable piece for me since I actually do need a place to dry herbs.  I love that this functions to help take up some of that blank space on the long wall in my dining room. 


I took a piece of reclaimed lumber, seven knobs and pulls from my ever-growing collection, and drilled spaced holes sized according to the knob's screw size and just twisted the knobs into place. Marc helped me put the french cleat (one of the best inventions ever) and finished project up. I place three framed art photographs that are special to our family above, and then done. 


Really looking forward to using it this year- and more than ready for this winter weather to be gone for good!


Have an inspired day!


(For those of you wondering why I didn't give the name of the photog who created the art photographs, it is per his request that he remain private :)  He does  not sell or distribute his work.)

Tuesday, December 31, 2013

Inspiration: This Year's Tree and Mantel

Just a quick post to share this year's tree and mantel decorations...


Four years ago I switched from a gold/cream/burgundy color scheme to white/silver/clear glass. I had hand-made the stockings for the previous colors many years ago and finally switched to cream and burlap stockings this year. So happy I did- I am totally in love with our new stockings. I also went with a burlap tree skirt and natural crepe bow and streamers for the tree and added some variations to the whites, including cream and ivory ornaments. This year's tree is absolutely my favorite so far. I added one of my paper pennant banners to the mantel that I simply have been unable to convince myself to post in the shop because I love it so very much, lol! Well, It's mine for good now....


One awesome find I wanted to share this year are my new sets of glass icicles purchased from a glass artist, R. Keller, of Keller Glass blowing. Absolutely beautiful and extremely affordable. Make sure to check them out.

Cheers!


Friday, December 20, 2013

This Year's Teacher/Staff Gifts

Kids are home from school and it is officially winter break- Yay!

Today I sent the kids to school bearing gifts and since I have been so bad about blogging, I decided this would be the perfect opportunity to get back on track.

The great thing about this post is that it still can be used as quick, but thoughtful last minute Christmas gift ideas.

Jonathan, who is in middle school, was sent with two plates of home baked cookies- one for the teacher's lounge and one for the office.  I used my vintage seam binding, and handmade tag, and the cookies are on a (parchment lined) silver platter. The platters are a great find from the dollar store.


Bekah's were a little more involved. We bought glass mugs from the dollar store, Nestle hot cocoa mix, ultra mini dark chocolate chips, and mini marshmallows. I also found adorable (individually wrapped) candy cane spoons that I ordered from Oriental Trading Company.


Unfortunately the spoons sold out so no link. I can see why....they're so awesome! Hopefully they will have them back in stock for next year.  The cellophane food bags were purchased from Jo-Ann Fabrics. They came with the silver food grade ties as well.  In one bag I put the cocoa, mini chips, and marshmallows. Then added the spoon and the wrapped cookie. Add the vintage ribbon and the personalized tag, and voila!


Have an Inspired Day!


Sunday, July 28, 2013

Urban Goose Chase Review


For those who may be stumped by my title....and asking, "What is an Urban Goose Chase?"  It is a big city "action task" scavenger hunt using mobile devices to run and capture the event.  I will post a link below, but because I saw such a lack of reviews and information on the event outside of their own site, which isn't exactly an "unbiased" opinion, I thought I would give it a go on my blog.

To preface, it was just made official that our team, Suburban Marauders, won 1st place for Saturday's Detroit event...so I will do my very best to be fair in my assessment and maybe give a few tips that will help future urban goose chasers beyond the obvious "Read the FAQ's and rules on the site" ;) Also, a couple observations come from some very deep digging on the net and their facebook page for common complaints.

Shout out to my Suburban Marauders peeps: Marc, Mike, Liz, Vinh, & Team "Captain" Chris!


1. To start:
Well, there is no "Starting Point" in the game.

This leads to some odd situations where people are not doing the hunt completely in the big city limits. However, I would say for the most part that people follow the rules to stay "in the area".  The issue I see arising from this, is some of the tasks are extremely difficult in certain cities, and for that, are high point tasks.  (Such as, finding a gas station or grocery store in downtown Detroit to complete a task.) If someone didn't follow the rules and went outside of the city to complete most of their quests, they could easily find themselves winning the game.  

I think a "start point" would put people on an even playing field.  On the other hand, it was nice to be able to use some level of strategy what part of the city to start in, and alleviated many of the "following" teams that will piggy back on your efforts by simply following you around.  We actually had one team use that strategy yesterday when they realized that we were the leading team at that point. I don't have a problem with using strategy like that...but it would definitely become redundant and would also create a situation where one specific area becomes inundated with the contestants. I am glad that we had the element of surprise and not viewed as more of a nuisance by most of the people we asked for help. Additionally, it allows people to be far more creative with their submissions- which is half the laughs, after all!

In conclusion, no starting point spreads the love all over the city, but maybe an initial gps "check in" should be incorporated in the game so that they can confirm that all contestants are in the city when they start playing.

2. Clear photos are very important.

If you or the person you are asking to take pictures can not click a clear shot, you may be out of luck.  Make sure you have a decent phone and a reliable picture taker. Double check photos before you submit.   Case in point, we all paid to get on the people mover, with the Macarena blaring on a team member phone, and over 8 people doing the Macarena, including two small children sitting in seats (for safety) dancing with their arms. The guy who took the shot only snapped 7 of us, blurry, pretty much arms only.  We had to jump off in a rush next stop, and when we saw the image didn't realize what he had done. We may have done the challenge, but we didn't get the shot approved (which we absolutely agree with that choice by the judges). It was worth a ton of points. Learn from our mistake.

BAD  Photo :(

3. The devil is in the details (kind of)

Be very careful to read the quests. One tiny detail will cause you to have the photo eliminated. Kind of. The judging is NOT equal or fair. Some people got a pass for the same mistakes that we made (example: one of our photos was eliminated because we did everything asked except wear a helmet.  Another team made the same mistake and their photo was not thrown out.)  And there is no way to dispute a judge's decision. So do as many tasks as possible and don't give up....you never know what photos will be thrown out for all the teams.  

4. People can be haters (sometimes)

Unfortunately, UGC incorporated a up/down voting system on the app photos.  It is totally unnecessary and does not affect the final judging, but what it does do is allow other teams to be negative and spiteful. Remember to not take it personally when you see your photos downvoted on the app and have no idea why (there are no comments, thank goodness). It also allows other teams to be nice, but when it's a competition like this, and people are grumpy about unfair judging, or they want to psych out another team...they let it out the only way they can...down-voting other people's photos.  They will even downvote great photos done within the rules...don't let it get you down.  I think the up and down voting should be completely removed.  It serves no good purpose. So I suggest ignoring the up and down voting completely while you play and after during judging. Remember to just stay upbeat. Smile and wave at all the orange peeps, remembering that the people running around competing against are playing the city jesters just like you!

5. Judging is not always "fair"

Yeah, I know I already said that, but it bears repeating. Be prepared to have fun, be prepared to have a great time with friends, be prepared to walk A LOT, and get out of your comfort zone. But with that said, be prepared to suffer a couple of disappointments and a few surprises at final judging. It's probably simple human oversight for the most part.  I am sure people have lost the winning slot because of unequal judging, and it doesn't look like the owners of UGC will be doing anything about some of the glaring inconsistencies. They state clearly that judging is final and they will not answer emails contesting judging. I hope they will change this, because it stinks. BUT, if you remain focused on just having fun and enjoying the actual competitiveness with other fun-loving people- you are going to have a GREAT time.

6. What watering hole?

It was really a bummer that at the end there was no sponsored eatery with a bar.  I definitely think all cities should have a proposed destination where everyone can meet up after it's over.  Obviously this would be optional, but since there is very little way for people to communicate before and after (besides a very obscure "recent posts" section on their Facebook wall that can be muddled with other unrelated questions, photos, posts, etc.)  I would have loved to toast everyone who played along and share stories and laughs about our day's antics in the big city. While I don't think people should message each other- that could go wrong on so many levels- I do think UGC either should not post on their website that people meet up after at a "watering hole" unless it is easier for one to be met up at, or simply fix this issue. I think it would prove a great promotional benefit if they pulled in the help of an establishment for an "after party" location.

Final thoughts:

I would absolutely do it again, and plan on it. Our team went in not expecting anything but a fantastic day together as friends...we were in shock to find we were battling for 1st place half way through, and while certainly, that made it all the more fun, it would not have changed that this is indeed a tremendous way to spend a Saturday with fellow fun-loving people! Want to join in an Urban Goose Chase near you? Just go to urbangoosechase.com.

Happy Chasing!

Celebrating at our watering hole of choice: Detroit Beer Co.


Monday, June 3, 2013

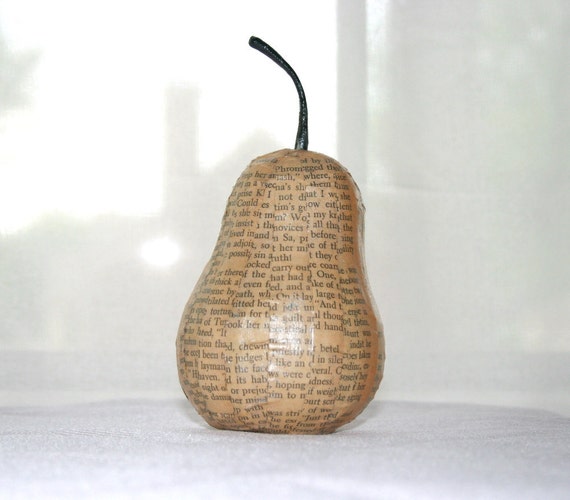
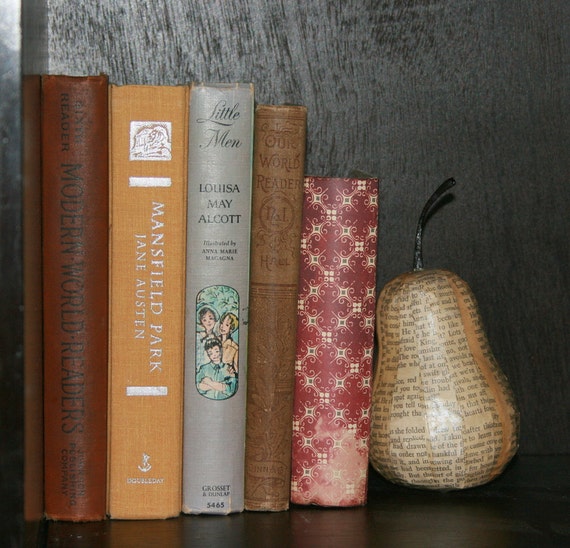
Dollar Bin: Paper Mache' Fruit


Dare I admit that my paper mache' sculptures are sometimes dollar bin finds from Michaels?  Of course!

When I first purchased the paper mache' fruit, I think it sat in my "future use" storage for a few months. Which is actually pretty good, because the average is a couple years unless I am incredibly inspired about something. Sad, I know.  But I have accepted that my inspiration for things can be very overwhelming since I see an idea or tweak in most everything around me. These fun fruits found their way onto my design table faster than most because I was working on cupcake gift boxes.  I had a lot of extra glaze (a special mix I make) so I grabbed the fruit and some vintage paper and got to work.


I have a method to my madness in covering pieces to enhance shape and form and the text from the book I am using, and it does take a lot more time than just slapping on pieces willy nilly.  But willy nilly would work nicely too for those with a little less patience than me.

I haven't made any in a while, but just looking at the photos again reminded me that there are a few more lonely fruits in storage....banana anyone?

Saturday, April 27, 2013

Daddy Daughter Dance Layout

I don't often get the chance to create a personal layout these days, but I have found that the best way for me to get out of an artistic block is to pull together a layout from a recent photo.  I struggled with this picture because the backdrop in the photo is garish.


Finding paper or embellishments matching the "neon garden" style requires a little digging. Luckily I remembered purchasing this great Simple Stories line of paper at Scrappy Chic called Fabulous.  And even though the paper was originally for a bedroom decor project in Bekah's room, I had purchased the bright crochet flowers with this layout in mind. They fit perfectly together.  


The kraft tags are stamped with some fun images I have collected over the years from those same dollar bins, and the title is made with Technique Tuesday stamps. Pearls also came from that same famous bin....notice a pattern here? My husband always announces in Michaels when we approach the front to pay for my supplies, "And now 15 minutes to stare at the dollar junk." Then proceeds to start playing a game on his phone.  The craft stores have made a mint off of me from those bins. Of course, I have made some pretty nifty things from them, so the complaints have evolved to a teasing joke :)

On Monday, I will be showing examples of the fun things I have made over the years from the craft store dollar bin. I look forward to having you come share in the inspiration!

Faith

Monday, January 7, 2013

Inspiration Tidbit: Vignette Addition

An inspiration tidbit from my home to yours:

A little something I added to my entry vignette :) This is just a quick impromptu blog, so forgive the "less-than-desirable" photos.  The "vintage door knob" hanger was from Hobby Lobby, and the keys were from the dollar bin in Michaels. I tied the keys together with my hand-dyed vintage ribbon- Love how it turned out!  


It was a quick way to make fabulous impact on the overall balance of the vignette design. (Framed photo is photography by: Ara133Photography)

Have an inspired day!

Sunday, December 23, 2012

Replaced on the Dollar- IKEA Blomster

Every once in a while I find something on the cheap to replace a design element I have held off on purchasing.  This one I just had to share.

I have been eyeing the IKEA Blomster clear 3-pc set for quite some time. I wanted 3 sets for Christmas decor and other event decorations. They are very versatile, beautiful, and tealights are a quick, easy, inexpensive, no-mess way to add candlelight to a party.  Unfortunately, tealight holders generally don't have a lot of height, or are very style specific. I had seen a few examples of clear glass holders of tiered heights in a couple design magazines, but had no idea where to get them.  That's why, when I found the IKEA set, my imagination went wild over all the great ways I could achieve different looks with vignettes, table top decor, etc. I thought the $15 per set of 3 was a fair price.  I know not everyone gets so excited about tealight holders- call me strange- but I was seriously giddy when I found them.


However, I had not gotten around to forking over the $45.  Other things always seemed to catch my eye in IKEA when I would drop in to blow all my money pick up a few things.  Imagine that.

But now, boy am I glad I was sidetracked because look what I found at the dollar store:


On the mantle at home- yay!
Now, I know they are not exactly the same in design, but they function exactly the same way, and certainly meet the standard of "pretty darn close".  I actually find the ones from the dollar store to be more neutral in design...which is a good thing for these in particular. Especially since I am buying them for their design versatility.  


I purchased 9 holders in-store (the equivalent of 3 sets) for $9!!!! Two sets are already up on the mantle for Christmas- love it! The reviews do note about the stickers...I had no problem removing them by laying them in a casserole dish and gently pouring hot water in the dish to let the stickers soak.  The stickers rubbed right off without any issues. 

If you buy online, I think it must be purchased in bulk, but I had no trouble finding them locally for a $1 a piece.  And, seriously, you can get a box of 24 for less than the cost of 2 Blomster sets if purchased online at dollartree.com.  


This is definitely a win-win find. What awesome dollar store items have you found as a trade for a much pricier item? 

Have an inspired day!

Faith


Sunday, August 5, 2012

My Black-eyed Peas Recipe

Today we are having one of my favorites meals of homemade comfort food heaven: Southern style barbecue pulled pork, black-eyed peas, collard greens, and macaroni and cheese.  By far my husband makes the best mac and cheese I have ever had in my life. And sorry, he doesn't give out the recipe ;) So I am stuck with giving you my black-eyed peas recipe, which the whole family loves as well. (At least, that is what they say....haha) It is surprisingly healthy- unlike that macaroni and cheese that makes you gain five pounds just smelling it- and can optionally be made with more liquid added along the way and some favorite veggies to make a yummy soup.

What you will need:

1 Bag of dried black-eyed peas, rinsed and soaked.
10 cups Water
1 Smoked ham hock
1 Green tomato, quartered
1 Small Jalapeno, halved and seeds removed
2 Garlic Cloves, peeled and halved
8 Fresh sage leaves
3 Sprigs of thyme
1/4 Large red onion, halved
1-2 tablespoons Salt (or to taste)
1/2 teaspoon White pepper

Bring first 8 ingredients to boil all together in a large pot or dutch oven.  Turn down burner to low and let simmer for one hour. Stir occasionally and check water level to make sure water is always above the beans as they cook. Add salt and pepper to taste. Continue simmering on low until beans are tender and soft with no graininess, always remembering to stir occasionally. Remove ham hock from the pot, and cut of all meat from the bone and chop up into small pieces. Remove garlic, herbs, pepper, and onion (or leave them in and just avoid them when serving). Add ham hock meat back in, and stir. Serves 8-10 as a side dish.

Enjoy!


Wednesday, July 11, 2012

Quick Upcycle: Cork Board

Hello to all!

It has been an insanely busy Summer so far, but one of the things we have been working on is our home renovations (Yes, still going...but the end is in sight.)  Here is a quick revamp of an old (and ugly) cork board that is now hanging on the wall behind the door in my daughter's room.  It's a tight squeeze for photographing so photos aren't magnificent, but hopefully you will glean a little inspiration of your own from it.


To achieve this look, I covered and taped off the cork board then spray painted the frame.   Once dry, I carefully inked up a large corner stamp (Fancy Pants).  I actually did two trial stamps on the back of the board to get a feel for it- it's hidden, so I highly recommend it so you can get a feel for the ink and pressure you will need :)  A stencil and paint will work fine for the corners as well. Once this is done, attach the hangers that go with the board (if you don't have any, they can be purchased at any craft/hobby store.)


I doubled the twine and tied it off a few inches off to the side, and tied the ribbon and tags to the twine using a bow from the long hanging ends.  You certainly could just do it in the center, but I love the look of offsetting, and am playing with the idea of adding a paper blossom arrangement later.  

Materials you will need:

White paint (I used spray paint)
Large corner stamp or stencil
Ink or paint for stamp/stencil
Thick twine or thin rope
Decorative ribbon scraps
Tea stained and stamped tags
Painters tape and covering for the cork

Have an inspired day!

Faith


Monday, June 11, 2012

Custom Recipe Boxes

I often have customers ask me how the process works, and I thought it about time that I blog about the wonderful way I get the opportunity to create something uniquely beautiful for each customer.

The first thing I do is get an idea of my client's style and color theme.  My favorite way of do that is to send them over to design-seeds.com where they can pick color palettes that suit the look they want.  I also have them go to my facebook page to look at my different created boxes and my pinterest boards for style ideas and inspiration.  Knowing what catches their eye give me wonderful insight into their bent of artistic style.

Once we hit that point, I might ask a couple clarifying questions.  Sometimes, clients tell me to just do my "thing" from there, but usually this is where I send swatches for the client to pick from, reminding them that this is probably a paper from a line of many patterns.  Their box will generally not be exclusively the paper swatch chosen unless requested.  Here is an example:

A client picked the far right swatch-


These three paper swatches I sent were based off of this design seed pick:


Her recipe box turned out to look like this:


As you can see, I use finite cutting techniques to add additional layers to the patterns from papers that are in or match the same line, as is also exampled here:


And sometimes a customer asks for a special personalization: 


The time to create can differ from one box to the next but generally takes a week from start to finish including a painted interior. Each is made to order.  Lead times vary by the amount of custom orders I am already working on, so sometimes it can take a bit longer. 

This is truly one of my favorite parts of my business- creating these special recipe boxes for others.  It's even more heartwarming to hear back from my customers with stories of the way it has been used or gifted. I even get photos of the box in use every once in a while and that just tickles me pink!

So a huge "Thank You!" to my many customers who have given me the opportunity to create a recipe box, just for them!  

Faith

PS If you are looking to have one made as well, just click here.